One of the most common and useful pieces of advice that can be given to most people is, “Eat more vegetables.” We all know this and believe it, but it still needs to be uttered time and time again.
Vegetables are often endured rather than enjoyed. I believe this hints at the key. If you can enjoy eating vegetables rather than tolerating them as a necessary evil, you are on the road to success.
Cooking Is the Key
So why aren’t people enjoying their vegetables? “Because they’re horrible!” No, although in some cases the perfectly uniform, immune-to-seasonality supermarket offerings are less flavorsome than the gnarly, still-got-some-dirt-on-them farm shop options. But I digress. Vegetables are the essence of freshness and are usually packed with complex natural sugars. How is that not yummy?
“If you can enjoy eating vegetables rather than tolerating them as a necessary evil, then you are on the road to success.”
Because vegetables are being handled wrongly. In a lot of cases, the go-to method for cooking is boiling, which is rarely the best option. It tends to leach out flavor and color. You’ve probably seen the green-hued water going down the drain. That wasn’t just the beautiful color you poured down the drain – it was the flavor and a fair few of the essential nutrients, too.
In this article, I will show some of the techniques to creating better vegetables and share a few appealing side dishes for your repertoire.
The Basics: Cutting an Onion
After a brief online chat with the Queen of the Swing, Tracy Reifkind, I’ve decided to start at the beginning. She said she loved the picture at the top of my Facebook page, which is me chopping an onion for a guacamole. Chopping an onion correctly is a perfect real-world place to reconnect with your food.
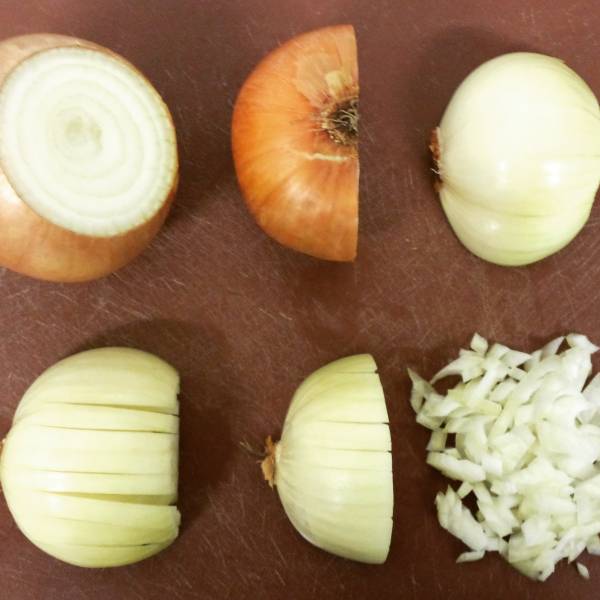
Here’s how I dice an onion:
- Cut the top off, the point end, and leave the root intact.
- Place the cut end face down on your board, then cut in half through the root.
- Now peel your halves and set the halves cut-side down on your board.
- Make multiple cuts from root to tip all of the way through to the board, allowing the root to hold it all together. That’s why I left it on, you see.
- Cut width-wise at right angles to the last cuts, and voilà.
How to Blanch an Onion
The next step is blanching. To some this may seem like an unnecessary complication, but it has many functions and is the main difference between domestic and professional vegetable cooking.
Blanching comes from the French word blanc, which means white. Rarely are you actually whitening anything, but more avoiding altering its color. That basically describes one of the process’s functions. Blanching sets the color of green vegetables, making them appealing to the eye. After all, the first taste is with the eye, and the more we stimulate our senses with food, the more satisfying it is.
“Blanching sets the color of green vegetables, making them appealing to the eye. After all, the first taste is with the eye, and the more we stimulate our senses with food, the more satisfying it is.”
Blanching is also referred to as “parboiling.” The partial boil starts the cooking process, which allows further processes to be more thorough. It has another benefit, in that it leaches out bitter flavors that can turn people off some vegetables like sprouts, chicory, broad beans, and so on. (Although on a more advanced note, bitter flavors are useful to offset saltiness.)
So how do we do this trick? Easy.
- Bring a large pan with plenty of salted water to a rapid boil. There needs to be enough water so that the addition of the vegetables doesn’t drop the temperature too much. As far as salt is concerned, Italians have a typically poetic guide for salting blanching water. They say it should be as salty as the waters of the Mediterranean ocean. But that little bit of lyricism doesn’t provide me with any actual insight as I have never been there, so roughly half a teaspoon per pint is fine.
- Drop in your trimmed vegetables and boil for 2-3 minutes.
- Immediately transfer the vegetables to either a bowl of iced water or set them in a colander under running cold water. This is to cool the vegetables as quickly as possible, thus halting the cooking. Then drain to remove excess water.
From here, knowing how to brown vegetables is a simple little bit of knowledge that can make meal times a lot more pleasant. Brassicas – which are your cabbages, all of the broccoli family, and Brussels sprouts – have a lot to gain from a little browning. This idea is often illustrated with the popular idea of frying blanched cabbage or Brussels with bacon.
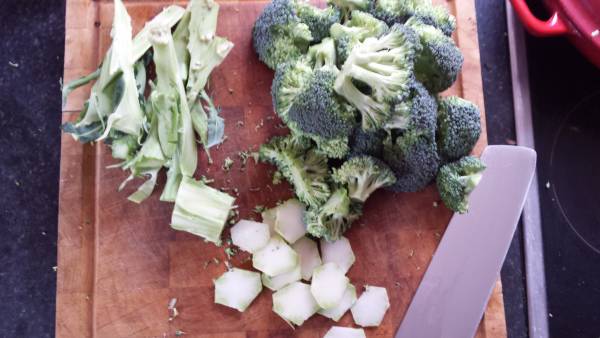
To brown the vegetables, all you need to do is chop and blanch the vegetables as above, ensuring they are thoroughly drained and evenly patted dry with a clean tea towel. Then quickly sautée them in a pan with a little butter just before serving. This is also an opportunity to add a little flavor if you like. Garlic is always a welcome addition.
Continue to Page Two for Five Recipes
1. Blanched Broccoli
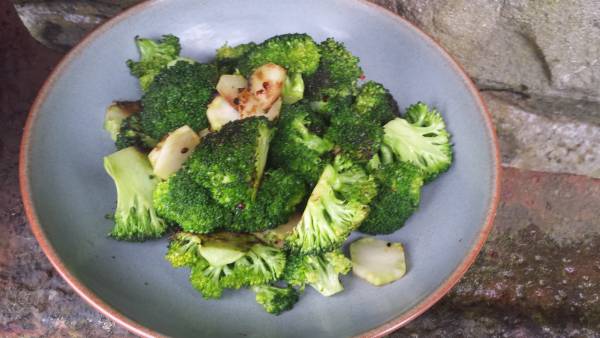
This easy broccoli recipe is a perfect accompaniment to a simply cooked piece of fish (I’ll get into fish cooking next month). This is my go-to technique for all greens, especially the mysterious farm shop finds like rainbow chard or sprout flowers.
Ingredients
- 1 head of broccoli
- 1 Tablespoon oil
- 1 teaspoon chilli flakes
- 1 clove garlic
- Salt and pepper
Method
- Put a large pan of salted water on to boil. Trim the florets off the broccoli and chop them down to roughly the same size. Then – waste not, want not – peel the woody outer surface off the stalk and slice the stalk into pieces about as wide as a gambling chip.
- Drop the prepared broccoli into the boiling water for two minutes. Then drain in a colander either under cold running water or, better yet, in iced water. Then drain again. It can now be left until a few minutes before dinner (which, incidentally, fits with resting time nicely. Remember last month’s article!)
- A few minutes before dinnertime, put a sauté pan or wok onto a high heat. When hot add a bit of oil and throw in your drained broccoli. Now cover and leave for two minutes. Don’t touch it so it has a chance to catch some yummy charred bits.
- Lift the lid and add the chilli flakes, crushed garlic, and a little butter. Give the pan a shake and replace the lid. Leave for another minute before serving.
2. Perfect Glazed Carrots
Okay, on to carrots. Boiled to death or left a bit crunchy (“al dente”), they are a staple on many dinner tables. But there is another better way.
Unlike green vegetables, carrots are a bit too substantial for a quick blanch to make much of an impact. But boiling has the same problem in that some of the flavor is leached out into the water and thrown away. The technique I’ll show you captures any lost flavor in a little butter so it stays as a glaze. Delicious. This method is easy, but takes a while, so get them on early.
Ingredients
- 1 lb carrots
- 1 desert spoon (2 teaspoons) butter
- Salt and pepper to season
Method
- Put a wide based pan onto a medium-low heat.
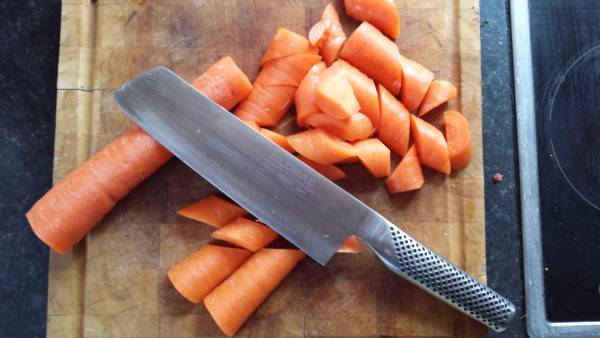
- Prepare the carrots by scrubbing clean and top and removing the stalks, then cut them in half along the length. Lay them cut side down and slice on the diagonal into about half-inch pieces.
- Put the knob of butter and a desert spoon of water into the pan along with the prepared carrots. Put the lid on and leave for 45 minutes. Check after 5 minutes that the temperature isn’t too high. They shouldn’t be sizzling or getting any color.
- When cooked, season and serve.
3. Celeriac Puree
Celeriac or celery root purée is a sophisticated alternative to mashed potatoes. The slightly aniseed taste enhances pork and red meat to no end. Plus it’s pretty simple. The same technique works well with cauliflower, too.
Ingredients
- 1 celeriac or celery root, peeled and roughly chopped
- Milk
- A knob of butter
- Salt to season
Method
- Put a saucepan onto a medium heat. Add a knob of butter and the chopped celeriac. Cook for five minutes stirring regularly. It should start to brown a little.
- Pour in enough milk to cover. Bring to the boil, then simmer for 15-20 minutes, until tender.
- Blend it all with either a stick blender or in a food processor. Add a pinch of salt, then taste and add a little more if necessary.
- That will be perfectly sufficient, but if you’re feeling posh, pass it through a fine sieve.
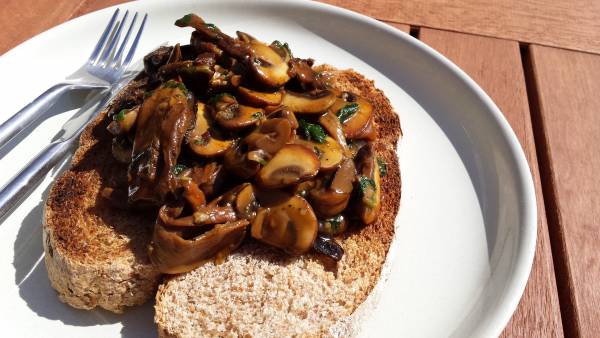
4. Mushroom Stew
I’m on a roll now, so here is another amazing and versatile recipe. Just this week alone I have served this with chicken breast and, on a separate occasion, a pork tenderloin. Both were quickly seared then gently poached in this aromatic awesomeness.
This also makes a great vegetarian meal by swapping the chicken stock for vegetable stock, adding a big bunch of spinach, and serving on wholemeal toast. Mmm, I think I will now I’ve said that.
Ingredients
- 25g (about 1oz) dried mushrooms (I used porcini, but a mixed bag would also work)
- 200g (8oz) button mushrooms, sliced
- 2 cloves garlic
- 1 teaspoon fennel seeds
- 2 teaspoons chilli flakes
- 1 liter (about 32oz or 4 cups) chicken stock
- Butter for frying
Method
- Boil the kettle, then put the dried mushrooms into a small bowl and cover with boiling water.
- Toast the fennel seeds in a large frying pan until fragrant. Tip them into a pestle and mortar along with the garlic, chilli, and a little salt. Pound into a coarse paste. Put the pan back onto the heat.
- Put a little butter into the hot pan. Add the paste and fry for a minute. Add a little more butter and the button mushrooms. After a few minutes when the mushrooms have browned a little, take the rehydrated mushrooms out of the water and add to the pan. Don’t throw away the liquid, but instead tip it slowly into the pan. Discard the last little bit as there maybe a little grit in it.
- Add the stock to the saucepan and bring to the boil, then turn down to a simmer for 10 minutes.
- If you want to thicken the sauce, mix two teaspoons of corn flour with cold water. Add to the stew, stir thoroughly, and turn up the heat for one minute. Check seasoning and serve.
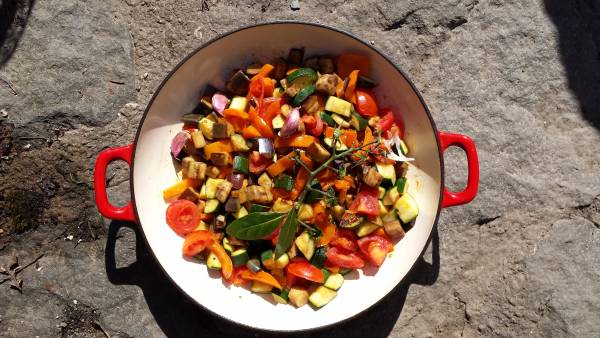
5. Ratatouille
I could go on and on with wonderful vegetable recipes, but I’m racing towards my deadline so I’ll finish with one more – my favorite, ratatouille. Again, it can be a meal in its own right but is also an amazing accompaniment to any dinner.
No dish simultaneously divides and unites the sons of the world’s greatest cookery nation quite like this one. Every French chef has their own definitive version that came from their grandmother, and nothing else seems to unite them in doe-eyed sentimentality quite as much as this classic dish.
Now, I’m not French, I’m British, which is why I’m going to have to say “eggplant” and “zucchini” instead of “aubergine” and “courgette.” But I have my own way of preparing ratatouille, and this also gives me a chance to share a couple of techniques I use:
- Purge the Eggplant: After slicing, sprinkle the eggplant with a little salt to draw out some of the water. Then rinse and drain. This purging process removes some of the bitterness. I would recommend this process whenever you are cooking with eggplant.
- Add the Tomato Vine: Have you ever smelled vine tomatoes in the grocery store, or even better, while they are still on the plant? Smells good, but that isn’t what tomatoes taste like, right? That’s because that aroma is in the vine not the fruit. If you add the retained vine at the end of cooking, boom – more yummy.
Ingredients
- 1 eggplant, cut into ¼ inch cubes
- 2 zucchini, also cubed
- 4 large vine tomatoes, chopped roughly and with vines retained
- 1 red pepper, sliced
- 4 cloves garlic, lightly crushed, left whole
- A few sprigs of thyme
- 2 bay leaves
- Salt and pepper
Method
- Heat up a large frying pan. Now put the eggplant into a colander and sprinkle with salt, then set over a bowl.
- Put a little oil into the pan and fry the zucchini for a couple of minutes, browning each side. Set aside in a bowl. Do the same with the red pepper.
- Quickly rinse the eggplant of the excess salt under running water, spread out on a tea towel and pat dry then fry and add to the rest of the veg.
- Lastly, cook the tomatoes in the pan for 3 minutes, then add the garlic cloves and all of the vegetables back into the pan with the thyme and bay leaves. Cover, turn down the heat, and cook for 20 minutes.
- After 20 minutes turn off the heat, lift the cover, season with salt and pepper, then throw in the reserved tomato vines for a minute before serving.
More Like This:
- How to Grill, Roast, and Stew Meat Like a Pro
- Do the Math to Make the Most of Micronutrients
- 7 Simple Ways to Get More Greens in Your Diet
- New on Pulse Beat Fit Today
Photo 1 courtesy of Ayton West Photography.
Photos 2-6 courtesy of Tim Harrison.


