Downward-facing dog, or adho mukha svanasana as it’s called in Sanskrit, just might be the most famous yoga pose of all. I sometimes call it the all-in-one pose because the benefits are so wide-ranging when it’s practiced mindfully:
- Elongates and releases tension from your spine
- Opens the hips and shoulders
- Stretches hamstrings, calves, arches, hands
- Strengthens arms, shoulders, wrists, ankles, abdominals
- Improves digestion
- Relieves back pain, headaches, insomnia, and fatigue
- As a mild inversion it calms the nervous system and relieves stress
Because this pose is so widely practiced, it’s often assumed that people know it, and proper instruction is overlooked. This means many of the benefits are lost due to misunderstanding and misalignment.
I’m going to share with you some of the key points I’ve found helpful over the years as a student and a teacher. Once adapted to your specific needs, downward-facing dog can be the perfect all-in-one stretch after running or other athletic activities, or as a way to quickly de-stress your body and mind.
Getting Into Downward Dog
I often describe downward-facing dog as an upside-down “V.” Here’s how you begin:
- Come down onto your hands and knees.
- Walk your knees about three inches behind your hips.
- Tuck your toes under and lift the knees off the floor.
- Allow your hips to lift up toward the ceiling.
- Allow your chest to press back toward your thighs.
Once you are here, check your hands to make sure the wrists are shoulder width apart (wider if you have tight shoulders), your fingers are spread evenly, your index fingers point straight forward, and the weight evenly distributed throughout your whole hand.
Next, lift up your heels and, with a slight bend in the knees, press your heels down toward the floor. As you do this, you should feel more weight shift into your legs. Once the weight has shifted, you can work on straightening your legs without shifting forward again. For many people, keeping the knees bent in this pose is the best option – especially in the beginning.
Once you’re in the basic shape of the pose, tune into your spine. It should be elongated. If it isn’t, one or more of these modifications will usually help:
- Move your feet and hands a few inches further away from each other.
- Open your feet wider and/or bend your knees.
- Open your hands wider and possibly even turn them out a little.
After you’ve made the adjustments to elongate the spine, you can refine the pose. This is my favorite part. It involves delving into the more subtle and sophisticated alignment points that start to rewire our muscle memory, nervous system, and brain. This type of work increases the elasticity of the mind, keeping it youthful and open to learning and growth.
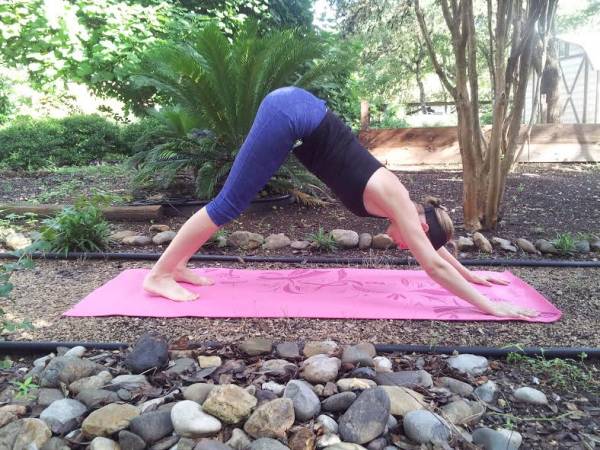
I often describe downward dog as an upside-down “V.”
Refinements
First, let’s focus on the hands. The proper placement of the hands is vital as it affects everything above. One thing I find helpful is to shift the weight out of the wrists and toward the knuckle side of the hand. This will ensure you never experience wrist pain from this pose.
“Because this pose is so widely practiced, it’s often assumed that people know it, and proper instruction is overlooked. This means many of the benefits are lost due to misunderstanding and misalignment.”
Also, a little clawing action of the fingertips, emphasizing the natural arch of the palms helps to cultivate what’s known as hasta bandha (hand lock). Hasta bandha encourages the energy to draw up through the hands and arms, rather than sinking into the gravitational pull toward the floor.
A common faux pas is to allow the inner hand to lift up, so always consciously press the base of the thumbs and index fingers down. This action becomes a helpful counter-action to the external rotation needed in the arms. As you press the inner hand down, turn the upper arms out. Remember, the arms rotate in the shoulder sockets so try to work from there. If this action is performed properly, the elbow creases will turn forward slightly.

Hand positioning with inner hand lifted (left), versus actively engaged and pressed into the mat (right).
Check Your Foundation
Your feet are the other part of your foundation. We want the inner edges of the feet parallel. For most bodies, this requires a slight widening of the heels. This ensures that the lower back stays spacious.
As you press your inner and outer heels down, lengthen the inner heels back. As you press the heels down, lift the inner and outer arches up. This creates pada bandha (foot lock), whereby the energy flows up through the feet and legs rather than dumping down into the floor.
Head and Neck
Now, notice your head and neck. Though the neck (cervical spine) is part of the spine, we often forget that and act as if it’s separate. So, be sure your neck and head are in line with the rest of your spine. Often teachers will instruct the ears to be in line with the biceps, but this may not be right for everybody. The most important thing is that the spine (including the neck) is in one long line.
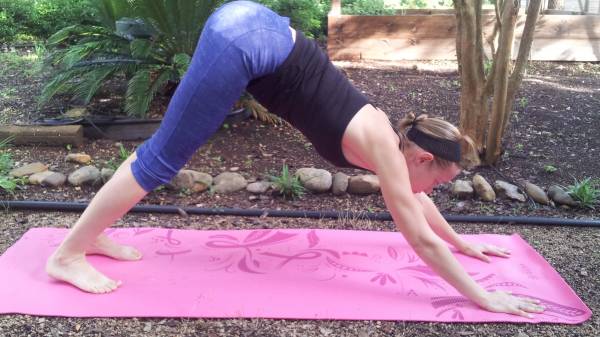
Avoid looking too far forward between your hands.
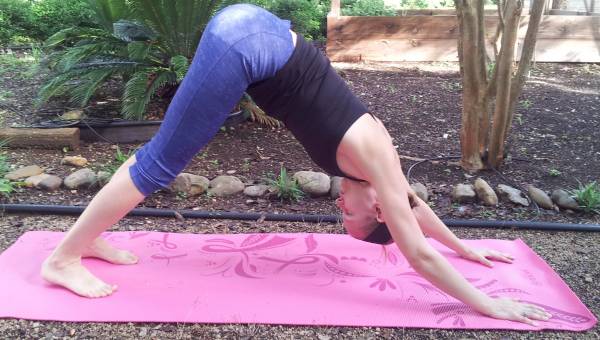
Or tucking the chin and looking too far toward your toes.
In addition, the neck and head should be free, not locked. Test this out by nodding your head and turning it from side to side a few times.
Things to Guard Against
- Hyperextension in the elbows and knees: If you have a tendency to hyperextend, keep a slight bend in the knees and elbows even if you think you don’t need to.
- Arching or tucking the lower back: If you have a hypermobile lower back, you’ll need to draw the navel up toward the chest to cultivate neutral alignment in the pelvis. Be sure you don’t overdo it and go into a tucking action – just find neutral.
- Ribs thrusting forward: If your front ribs are thrusting forward, soften them into the back of the body.
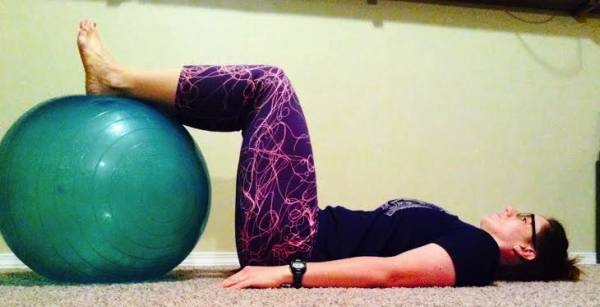
Avoid a slight anterior pelvic tilt (pictured at left), or posterior pelvic tuck (pictured on the right) and aim for neutral spinal alignment.
Since it’s often hard to feel this last aspect in downward-facing dog, one way to check yourself is in urdhva hastasana (upward-facing hand pose):
- Stand with your feet parallel and hip width distance apart.
- Raise your arms overhead with the palms facing in.
If your front ribs are thrusting forward, then chances are they do in downward dog, too. Find the action here of softening the front ribs down and lifting the back ribs up. You will feel a release in the upper back, shoulders, and chest. Now you should be able to translate the action in downward-facing dog.
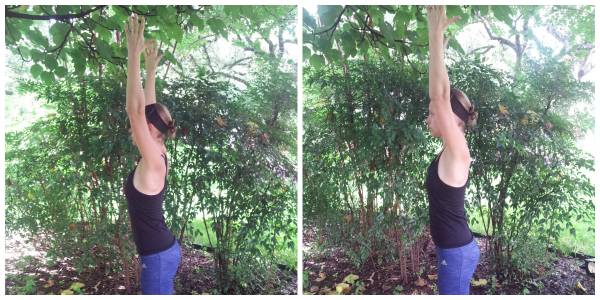
In the photo on the left, the ribs are thrusting forward. On the right, they are in proper alignment.
Breathing
Once you feel balanced in the pose, begin to focus on your breath. Breathe in through the nose slowly and out through the nose slowly. Allow your body to respond to your breath. Try imagining the breath coming in through the hands and going out through the feet.
At first, take up to five breaths at a time. You can rest in child’s pose (balasana) in between. The depth and quality of the pose will begin to reflect the depth and quality of your breathing.

Here’s the complete pose with proper alignment again so you can get another good look.
Find Guidance
As important as it is to explore on your own, be sure to enlist a qualified teacher to assist you. Because of unconscious patterns, we need that expert guidance to take us beyond our blind spots.
As with all yoga poses, as the externals become second nature, our energy is freed to focus more internally on the subtleties of our breath and body. This becomes the field for bringing old and often unhelpful patterning to the surface so it can be replaced with new impressions (samskaras) that serve our highest evolution.
More Like This:
- Downward Dog at the Wall: Releasing Neck Tension
- An Asana Evolution: 3 Simple Ways to Improve Your Yoga
- Balance: The Missing Link in Your Yoga Practice
- New on Pulse Beat Fit Today
Photo 1 courtesy of Shutterstock.


