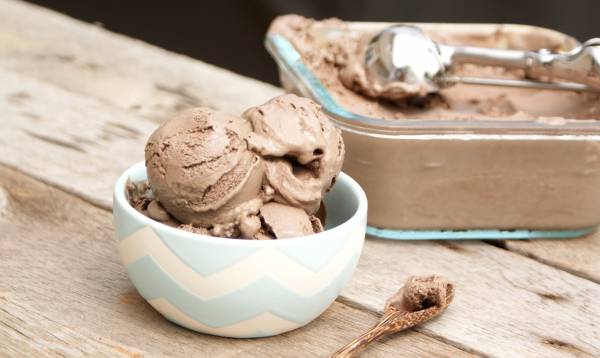
Enjoying a decadent creamy dessert was an idea I had tossed away as unattainable when I first decided to go dairy-free. Many of the dairy-free confections that were passed off as ice cream were more icy than creamy and just couldn’t compare to my old favorite indulgence of a true custard-style ice cream. The smooth mouthfeel that we define as creamy can only be created with fats, so using a base that doesn’t have much fat, like almond milk, will not result in the same experience.
In this particular ice cream, I’ve used a full fat coconut milk and good old egg yolks to create the intense flavor and custardy consistency I grew up loving. The healthy fats in coconut milk paired with more nutritious sweeteners than traditional sugar allow this treat to almost be considered a health food if you’re an athlete. Dark chocolate amps up the delicious factor with added antioxidants. It also contributes to some of the creaminess due to the cocoa butter components in the chopped chocolate.
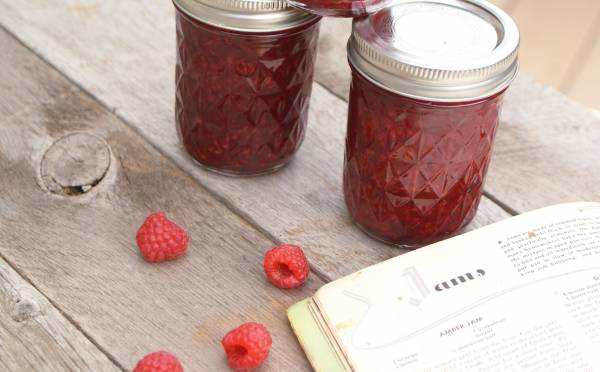
This ice cream is incredible topped with a homemade honey raspberry jam (bonus recipe below), fresh raspberries, and toasted coconut. I won’t tell anyone if you have a scoop for breakfast to indulge in this wonderful creamy dreaminess!
Double Dark Chocolate Dairy-Free Ice Cream

Prep time: 20 min plus at least 4 hours to chill and 30 min to churn
Yield: Makes 2 pints
Ingredients:
- 2 – 13.5 ounce cans full fat coconut milk
- 4 egg yolks
- ½ cup maple syrup or honey
- 2 teaspoons vanilla extract
- ¼ cup chopped dark chocolate
- ¼ cup unsweetened cocoa powder
Method:
- Whisk together all ingredients in a medium saucepan.
- Heat over medium heat until just about boiling. You’ll want the mixture to coat the back of a spoon but not to boil.
- Transfer mixture to a bowl and place in refrigerator to cool at least 4 hours. Mixture must be cold for it to churn well in the ice cream maker.
- Once chilled, pour into ice cream maker and churn according to the instructions. The custard should reach a soft-serve consistency. Pour churned custard into an air-tight freezer proof container and place in freezer to firm.
- If you do not have an ice cream maker, pour the chilled custard into an air-tight freezer proof container and place in freezer. You will need to take it out every hour or so while it’s freezing and give it a good stir or whip with beaters to incorporate air. Once it reaches soft serve consistency, you can leave it to firm.
- To serve, let ice cream sit out at room temperature for about 20 minutes so it’s soft and scoopable.
- Top with amazingly delicious toppings like homemade raspberry jam and toasted coconut.
Homemade Honey Raspberry Jam

Prep time: 60 min plus 24 hours for jam to cool and set
Yield: Makes 2-3, 8 oz jars
Ingredients:
- 2 cups smashed fresh raspberries. If you like it less seedy, feel free to press berries through a metal strainer. Be sure to measure the amount of raspberries after straining.
- ½ cup honey
- 1 ½ Tablespoons pectin for low sugar jams (optional – you can omit this ingredient but the jam will not set as firm)
- 2 to 3 jelly jars (8 ounce size) with lids and rings to seal.
Method:
- Place all ingredients in a saucepan and bring to a boil. Turn down to a simmer.
- Let simmer until jam becomes thicker, about 15-20 minutes.
- While jam is simmering, place 4 empty jelly jars in a large pot of water and heat it to boiling.
- When jam is thickened, scrape off foam if any forms.
- Carefully remove jelly jars from water with a tongs and then pour hot jam into hot jelly jars, leaving only ½″ space from the top of the jar. Use a funnel for easier filling.
- With a clean damp cloth, wipe the rim of the jelly jars to remove any spilled jam.
- Place lid on jar and twist on the ring so it is air tight.
- Place entire jar of jam back in the hot water (enough to cover jars by 1-2”) and boil for 15 minutes.
- Remove jars of jam from water and let sit out to cool.
- After 24 hours, check lids for proper seal by pressing on the top center. If it dents in, it has not sealed and will need to be re-boiled.
- If you do not wish to process in the hot water to seal the jam, you can simply keep these in the fridge for about a week or two. Sealed in jars, this jam will keep about a year.
More Like This:
- Beat the Heat With a Post-Workout Popsicle Party
- 2 Sugar- and Dairy-Free Ketogenic Smoothie Recipes
- I Scream, You Scream for Dairy-Free, Delicious Ice Cream
- New on Pulse Beat Fit Today
Photos courtesy of Kari Lund.


