It might sound crazy, but just a few years ago I was terrified to practice handstands. I remember going to CrossFit one day and seeing handstand push ups on the whiteboard. Suddenly I realized I needed to go food shopping instead of completing the WOD.
Over the years I’ve begun to get over my fear of being upside down, and now I practice handstands often. I still use the security of the wall, but just inverting in the first place was a big step. A lot of my progress was thanks to reading articles here on Pulse Beat Fit.
So, here are my favorite tips from the archives that explain some steps you can take to get upside down.
Step One: Acknowledge Your Fear
Willow Ryan’s piece, Dear Willow: I Am Afraid of Handstands – Help! was one of the first articles I read that convinced me to start working on inversions. I liked it because Willow didn’t try to convince the reader there’s nothing to be afraid of. Instead, she focused on working through your fear and taking small steps. As she explained:
Any way or attempt is better than being frozen in a pose. Create different thoughts around your sticking spot. The only way out of a ditch is to use your bean, grab some tools, and get to work. Think one foot in front of the other and move incrementally when the fears are the loudest. You can tread slowly and gently in this time while you adapt to new sensations or actions as your fears present themselves.
If you’re afraid of being upside down, that’s okay. Do little things like hanging out in downward facing dog or even over the side of your bed. These small steps will help you get used to the feeling of being inverted. And don’t forget to breathe. Not only will breathing keep you in control of your fear, but it will also create space and extension while you’re upside down.
Step Two: Practice Arm Balances
Practicing arm balances regularly was something I only discovered recently. Do them every day to build arm and upper-body strength while also challenging your balance – without the added trick of having your feet over your head.
This isn’t an original thought. Coach Max Shank demonstrated how you can use frogstand to build up to a handstand in 2 Ways to Bulletproof the Freestanding Handstand:
Practice holding frogstand (also known as crow stand) every day to get more used to the feeling of holding your weight on your hands instead of your feet.
Step Three: Elevate Your Feet
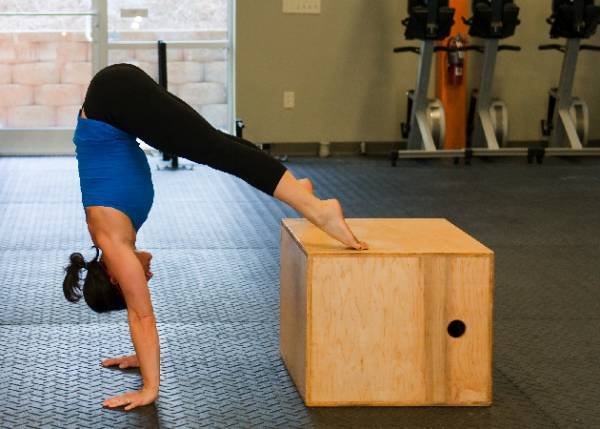
Once you have confidence in your upper-body strength and can breathe while shifting weight into your hands, it’s time to practice the hard part: getting upside down. In his article, How to Maintain and Control a Handstand, yoga instructor Jon Kolaska demonstrated how to practice downward dog at the wall to get your body inverted without kicking up.
If you watched the whole video, you might have heard Jon say some people practice handstands this way for months or even years. So if you’ve made it to this step, be confident in your progress.
Step Four: Loosen Up and Kick Up
The next part is where I’m stuck right now. I can get into the handstand against the wall. I can hold it for over a minute easily. But kicking up is another story.
Coach Logan Christopher gave helpful advice for anyone stuck on this phase of the handstand in his article How to Work Up to a Handstand Against the Wall. Logan demonstrated how to position yourself for a graceful kick up and avoid breaking heirloom family vases:
Step Five: Care for Your Shoulders
When I started practicing handstands regularly, I noticed my shoulders started to feel tighter. Make sure you take care of your shoulders if you’re focusing on handstands in your training. In her article, Are Handstands Good for You? A Yoga Teacher’s Perspective, yoga instructor Bethany Eanes gave three tips for keeping shoulders healthy while practicing handstands:
- Six days a week work on opening your shoulders and understanding external rotation of the joint.
- Limit your chaturanga push ups to no more than fifty in a given week.
- One day a week, without tiring your shoulders first, work on your alignment in handstand.

So, You Got It? Now Make It Better!
Gymnastics coach Pamela Gagnon (pictured above) summed up the importance of taking it slow while working on handstands:
Just as in a house of cards, when executing a handstand, you cannot haphazardly place your body upside down or get inverted. There are steps, progressions, and specific skills and drills designed to build your confidence, strength, balance, and coordination. Watch a gymnast kick to a handstand. It’s done with purpose. A gymnast’s legs aren’t thrown wildly in the air. Instead, he or she demonstrates body awareness, control, and aptitude.
Once you’ve mastered your handstand, I highly recommend you check out Pamela’s workout series, which she details in her article, My 4-Week Program for Achieving Handstand Happiness. Before you know it, you’ll be walking on your hands.
Happy handstanding, and let us know how it goes!
More Handstand Articles:
- Kipping and the Handstand Push Up: Is It Safe?
- 7 Steps to the Freestanding Handstand Push Up
- How to Hold a Freestanding Handstand
- What’s New on Pulse Beat Fit Today
Photo 1 courtesy of CrossFit Impulse.


